Thursday 1 November 2012

Using My Mould To Create My Chacter...

I have decided to use my two part mould to create my character. I wasnt so shire about how i was going to carry out making the character, so I did a few experiments. i was going to use J-Foam to make it. So that the J-foam didnt stick to the plaster mould, I painted it first with coloured latex.
 
 
I then place the armature (that is wrapped in cling film to protect the joints from blocking up with the jfoam.)


I the clamped the mould together. The foam comes in two parts, and once mixed together, takes  15 second before setting to I had to work with it really fast, and pour it into the holes I drilled in my mould very quickly. Once set, I could then take the mould appart.


 This first experiiment didnt quite go to plan. I think the problem was that we didnt mix up enough of the j-foam as the legs wernt covered.
 
 
I tried the same experiement again, but still there wasnt enought foam mixed up. For the thired experiment, I made sure there was enough foam.


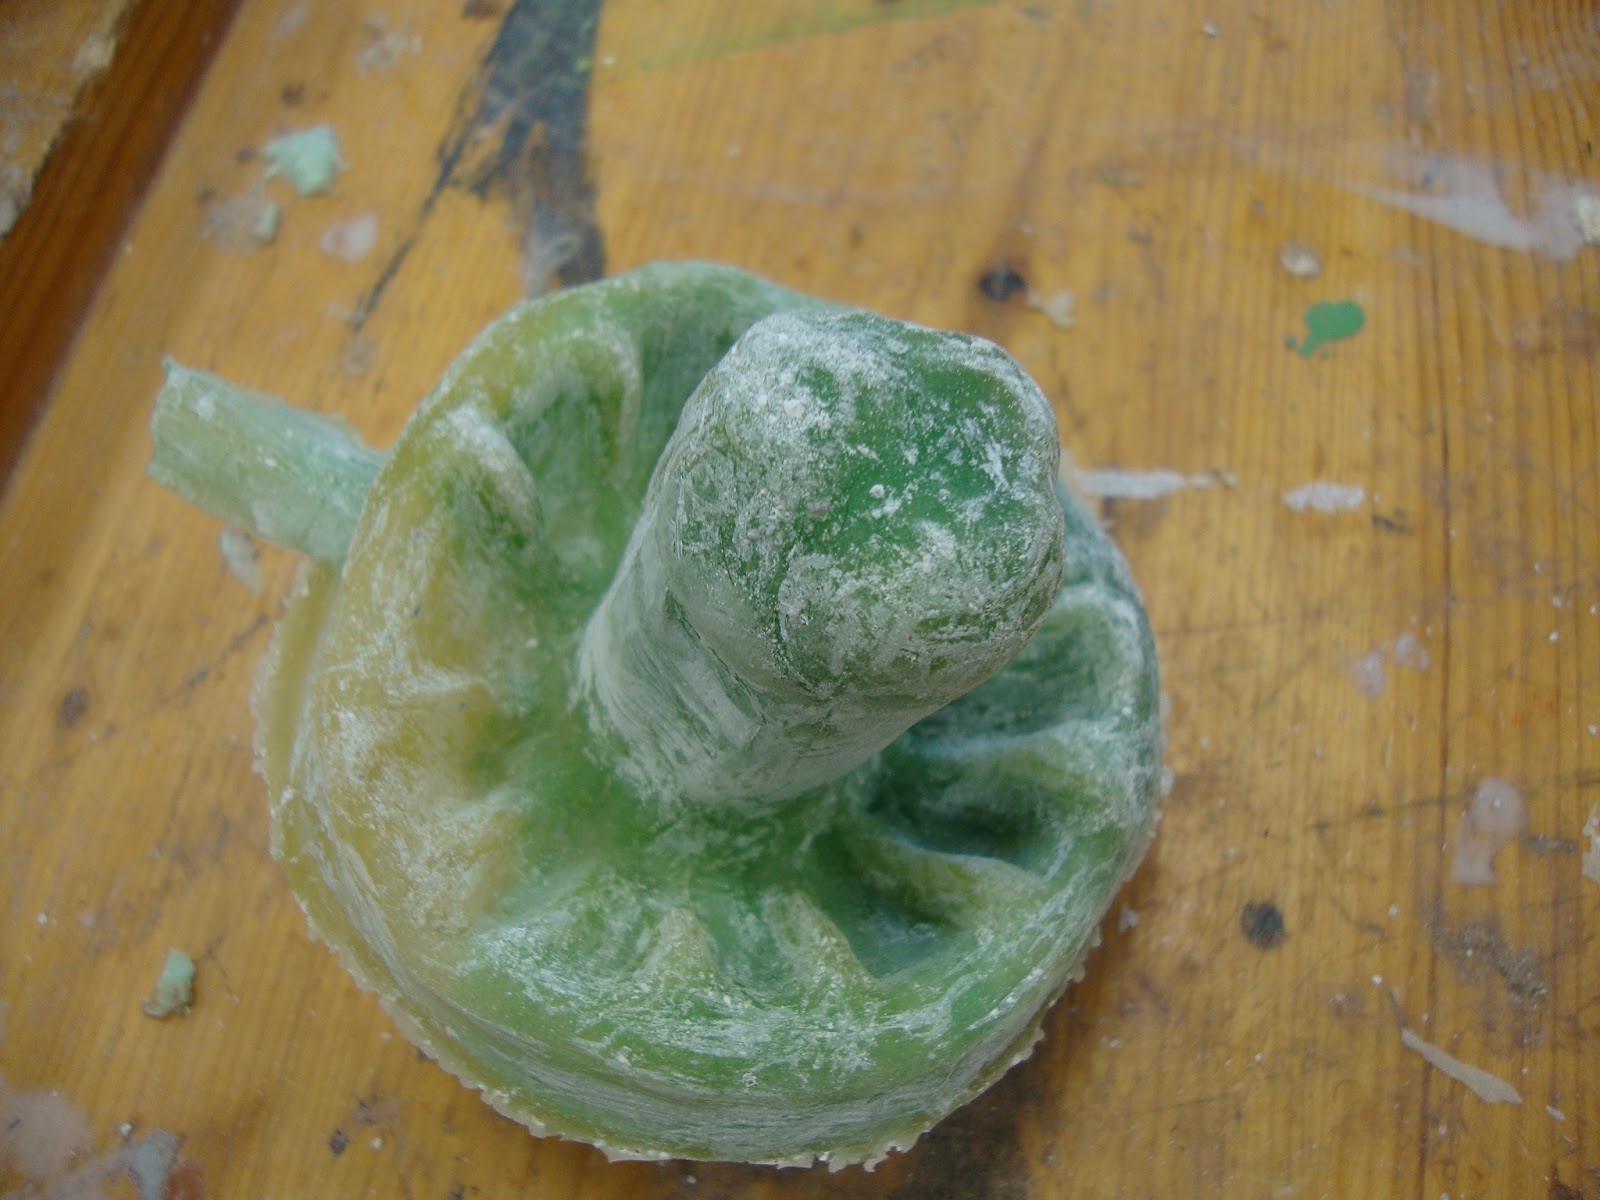
I could see that the foam had spread through the mould as it expanded through and out of the holes in the mould. I also did a thiker layer of latex and paint inside the mould. When the foam had set it was time to take the mould apart. Although the character came out fine, and was a sucess, getting it out of the mould proved to be really difficult. As I used lots of foam  to ensure all the gaps got filled in my character, but doing that caused the foam to leak out ans stick the two parts of the mould together. This caused the mould to break when I was attempting to separate the mould. Luckely my characte came out fine!


Once it was out of the mould, I trimmed  all the excess latex off the model and painted it using some acrylic paint and latex.
 
This is what the finished character looked like.
 
 
Although this process worked, I stil wasnt totally happy with it and still plan to remake it before I shoot the animation. When I remake it I will use the same technique, but will make the clothes out of fabric.
 

Thursday 18 October 2012

Making a Mould for my Character...

I have been working hard designing my main character for my stop motion animation. I now have a final design, and decided to experiment making the character. I have decided to create a two part mould. Here are some Photos of the stages I went through to created the mould.
 
Above is the design for the character, showing were the armature I bought will go.
 
 
To then make the mould I first needed to make the character from Plasticine, I wrapped the armature in cling film first to prevent and Plasticine or foam getting into the joins of the armature.
 

This is what the finished Plasticine character looked like. I left the hands off, as I wanted to make them at a later date.


I then began to make a mould for it using clay. I made a flat bed of clay that covered half of my model and put a clay wall around it to prevent the plaster from running out.


The first part of my mould is now complete and ready for the plaster.
 
 
To make sure I got no air bubbles in  in the plaster, I flicked it into the mould.
once the plaster had completely set, I removed the layer of clay, turned over the mould to repeat the process on the second half of the mould.


 Once the plaster was dry, I removed all the plaster, and notice the split line of the mould. I gently opened up the mould to reveal my Plasticine model inside.


Once the mould was open, I took out all the Plasticine ans cleaned the clay from the mould.
The finished two part mould turned out really well!
 
 
I plan to use this mould to make my character. I will add on a new post once i have made the character so you can see how it goes!
 

Saturday 6 October 2012

My New Armature!!


Here we are! My forth and final year at university. I am starting my Minor project. for this i have decided too look into and research how to make stop-motion animation characters I have written my own script and plan to make two of the characters.

in order to help me make a good professional character, I have bought a steel armature! I am really excited about this and cant wait to see what it can do!!!

Here a a few photos of my new armature!!!


Friday 4 May 2012

New Prop Project - My Animation Characters

For our new prop project, out brief was to create a prop that could be used to advertise something. I was given the topic of the 'Ford KA' I had to create something that would advertise it. I came up with the idea of creating a stop motion animation character/model that could be used in a tv/viral advert to advertise the car. I came up with an advertisement/storyline idea, and prepared my self to pitch it to the company. To help me pitch my idea, I came up with a Story board, character designs and a script. Some of the characters were very tricky to make. Here are some photos of the characters I created for the pitch.


Wednesday 2 May 2012

Set Design - My Carnival Float...

Now that the Theatre Royal Victorian Set has all been finished, out new set brief was to create a scale model of a carnival float. I decided to Design and make my carnival float based on the rainforest. I wanted to make people aware of how beautiful the rain foreset is.
Here are the final images of my finished carnival float.


I was really pleased with the outcome of my finished float, and pleased with what I had achieved in such a small time scale.


Saturday 31 March 2012

3 Weeks Work Experience...

Some work experience was brought to my attention from my tutor, to work on a project that's coming to the north east for 3weeks filming work. I sent off my CV to them, and shortly was invited for a short meeting/interview. I was welcomed into the art department working as a trainee and set dresser.

I was working on the 4 part Documentary 'Storm City 3D', creating the sets/scenes for the floods episode. I was given the responsibility of buying items and props to dress the set with, and then helping out with the building and decorating work. This was a really enjoyable experience that helped me to gain a lot of knowledge and understanding of the work that goes on in the art department, as well as good on set experience. I made some great contacts, and although it was new and challenging for me I loved every second of working on this project! I will keep you updated on when the documenry will be shown!

Saturday 3 March 2012

My Finishes Prop ...

These are some Photographs of my final Piece for my Flower Sculpture. This is only a small Model of something that could potentially be made bigger in the future. The idea is that the bird is using the flowers as an umbrella. I didn't quite go to plan, but I was pleased with the outcome and felt I learnt a lot from it.


Thursday 1 March 2012

Finished Set For The Theatre Royal...

After many week of hard work and a huge team effort, the Victorian set for the theatre royal in Newcastle is finally finished.

I think its safe to say our group worked really hard on making this set a success and we are all pleased with the final outcome. Here are a few images of the set construction ans what it looks like! Enjoy!


Friday 20 January 2012

Experimenting with Two Part Moulds....

As Part of my Prop Module, I have been Experimenting with Mould Making. This has  been a really new to me as its something I have never done. I decided I wanted to cast a Mushroom. Here are some Photos of the process.


 The mushroom didn't quite go to plan. i think the problem was I didn't add enough expanding foam. However I now know how to created a two part mould, and was pleased with what I had achieved.